Delicious Dal Makhani

I love to batch cook especially something as dreamy and delicious as Dal Makhani (pronounced mak-ni) using Urid/urad beans. Only available in Asian supermarkets so far in 2024 in my neck of the woods in south London. So I’ve adapted many different recipes, I use a presssure cooker, I soak the beans for at least 8 hours ideally overnight. And I cheat. So sue me. 🙂

Dal

  • 500g Whole Urad Dal (Black Lentils), I used the whole bag
  • Water, to soak the lentils, at least 1 or 2 inches about the dal level
  • Enough Water, to pre-cook the lentils, again 1.5 to 2 inches above the lentil line.

To Cook The Dal Makhani

  • 50g Butter, Ghee or Oil
  • 2 Medium White Onion, sliced or grated.
  • 2 tbsp Ginger-Garlic Paste (I used frozen cubes from the supermarket. I don’t even defrost but cook a little longer and add after a minute of the onions frying)
  • 1 x 14oz tin of chopped toms
  • 1 x 200g tube of tomato puree
  • 1 tsp Sea Salt to taste
  • 2-3 tbsp Kashmiri Chili Powder (I like it hot, so reduce to 1.5 tbs if you like milder)
  • 1 tsp methi leaves (fenugreek leaves)
  • 200ml Water, to further cook the lentils, if needed.
  • 1 tbsp Garam Masala
  • 2 tbsp Salted Butter
  • 75ml Double Cream

To Garnish The Dal Makhani

Instructions

  1. Soak the lentils. Wash the lentils thoroughly, then add them to a large bowl. Cover with plenty of water – add enough water so they completely cover the lentils with at least 1.5 inches of additional water on top of the lentils. Soak for 8 hours, or overnight but no more than 24 hrs.
  2. Once the lentils have been soaked, discard the water and wash thoroughly again in a sieve.
  3. Cook the lentils. Add the soaked lentils along with enough water to sit at least 1.5 or 2 inches above the lentil line in a pressure cooker(mine’s an old Aldi bargain and not an instapot). Add a tsp of salt. Cover and cook after reaching pressure for about 20-25 minutes. Once the lentils have cooked, they should be creamy inside when squashed. Mash them slightly to thicken the Dal.
  4. Make the Dal Makhani. Add ghee/butter to a large heavy-bottomed saucepan over low heat. Once melted, add the grated or sliced white onions. Sauté gently for 5 minutes, then add your ginger garlic paste. Mix well and sauté for another few minutes until all nicely caramelised, before adding kashimiri chilli, dried methi leaves if you have them, blended tomatoes, puree, cook until butter seeps out. Sprinkling in a little salt.
  5. Continue to cook on low heat, stirring occasionally, until the mixture has thickened. Once this happens, add this mixture to your cooked lentils along with an additional water if necessary, and Garam Masala.
  6. Cover and cook on low heat for an additional 10 mins.
  7. Finally, stir through salted butter and double cream. Adjust salt to taste.
  8. Garnish with extra cream, butter, and plenty of fresh coriander to serve if wanting it look a little fancier for guests.

Serving Suggestion: Plate alongside Fluffy Naan, rice or other sides dishes of your choice.
Chinese Style Chicken (or-anything-else-you-fancy) Curry Recipe

So, my last entry was some time ago, but hey, no time like the ending of the year to think about the future.

Getting ready to visit my mother-in-laws after Christmas, I was getting ready to perform my yearly ritual of cooking up leftover Turkey.  Having had a Turkey crown for two, the In Laws, had loads left.  I made two curries, a sweet and sour, the base of which was from a jar, I’m slightly ashamed to say, but I added additional spring onion, red peppers and pineapple chunks, soy, garlic and rice wine and the other – was my own work.  I had previously used a recipe from Jamie Oliver’s forum for the last few years but after searching high and low, it’s disappeared from the internet! On another foodie’s site, I hear that it was DELETED.  Why on earth would it be!?  But it was.  So I had to freestyle and remember what I’ve made in the previous years, and I have now a full proof recipe which I will keep here and will be readily available as and when!  And I hope you like it and can benefit too.

This is very typical of UK Chinese restaurant takeaway curries which normally use chicken as the meat and sometimes a scattering of prawns.

Feeds 4

Ingredients

  • 2 tbsp cooking oil (I usually use cold-pressed rapeseed)
  • 1 large WHITE onion (milder flavour than brown skinned), peeled & roughly chopped.
  • Pinch of crushed, dried chilli (if you like it hotter, of course, add more)
  • 1 garlic clove, peeled and finely sliced/crushed
  • 2 heaped tsp of medium curry powder
  • 1/2 tsp of ground cumin
  • 1/2 tsp of ground tumeric
  • 1 and a half Star Anise
  • Leftover turkey about 1lb, in chunky pieces
  • A splash of rice/Shaoxing wine (optional)
  • 1 litre of organic chicken stock, hot. (I use a cube)
  • 1 tbsp of soy/tamari sauce
  • handful of frozen peas
  • 2 tbsp of cornflour, mixed with 2 tbsp of water
  • 1 x handful of fresh/defrosted prawns (optional)
  • Salt to taste.

Method

Fry off the onion, on a medium heat till slightly softened, add garlic and crushed chilli and fry for a further 30 seconds.  Add all the spices, and stir vigorously.  Splash in the rice wine and allow to burn off.  Add cooked turkey and stir.  Cook for at least 2 more minutes over medium heat.  Then add the stock and soy sauce and bring to a consistent simmer. Then add frozen peas.  Then add half of the cornflour mixture until thickened.  If not thick enough add small amount of the remainder of the cornflour until desired thickness reached.  Taste and add salt if necessary or a little more soy sauce.

If you want to add defrosted or fresh prawns, this is the moment to add as will cook in less than 2 minutes.

If not using leftover turkey or other white meat, cook meat (chicken or beef)  first in some oil before adding onion.  If going completely veggie, add root veggies at the same time as the onion and allow to cook through in the stock.  If using less dense veggies like mange tout, broccoli, add at the same time as the stock and test so that they don’t go too soft.

Serve with Rice if desired.


Organic Food Co-operatives

Image

About a year ago,  I read an article about how consumers were banding together to create their own food co-operatives in order to order big to reap the economies of scale benefits and also not having to pay retailers costs, labour and delivery charges.

Ideally, I was looking for a few way to interacting with farmers and producers of all weekly consumables; food, household cleaning products, hygiene products etc.  Being a 21st century gal, I turned to the Oracle (the internet) and just did a search for local Food co-ops and found one near me called Transition Town Brixton which is quite close to me in South London.  I made contact and joined.  If they thought it was odd that I contacted them out of the blue like that, they didn’t show it, but subsequently, I’ve found out that most people join on recommendation of other members of the co-operative.

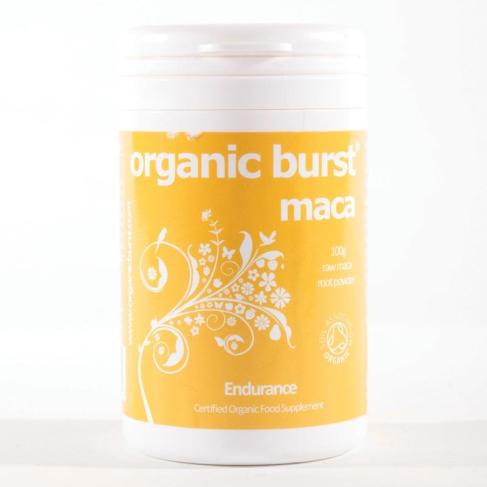
I like it, but unfortunately, I can’t buy everything from there but I am able to buy dry goods e.g. rice, coconut flour, natural soap (for me and for my laundry!), chocolate etc and the odd unusual find like Maca powder which is my current fad.  But they are unable to deliver fresh fruit, meat and vegetables, so I’m still making my way to Sainsbury’s or Tesco’s on a regular basis – boo.

The positives are that I save a little bit of money on organic products and pay no delivery charges.  The downside is the wholesalers will not split cases of products generally, so unless you can convince your fellow co-operators that Dr Bronner should become their ‘go to’ soap, you have to buy a whole case or just forget it.

The two main wholesalers we use are Suma Wholesale and Infinity.  Infinity seems a bit fairer than Suma, as it produces a wholesaler list of prices that is not tailored to you therefore, you know that everyone is paying the same price.  However, Suma is more hi-tech.  You have to log on online and therefore the prices you are quoted, I’m sure, are tailored to your spend.  Our spend as a collective, averages £600-£1000 per order, which probably isn’t huge when compared to independent shop orders.  I still think we may have a bit more wriggle room to get the prices down but we just need to get to know our value to them as customers.. and USE IT. 😉

Liquid Clothes Wash

P1050301

This is for anyone interested in a less-toxic clothes washing solution and also good for those who want to move away highly scented formulas.  A friend of mine’s daughter still suffers from croup and this is made worse by highly scented powders and conditioners.

Due to lack of emulsifying agents, this mixture isn’t uniform in appearance and needs a good shake before pouring.  I put it in an ‘in the drum’ jug that I sent away from one of the big soap corporations.   (Can’t remember which one now.)  I’ve been making this mixture for over a year now.  It’s really the reason I want to make my own version of Dr Bronner’s liquid soap to use as part of this recipe.  But I will do it… just not now.

Ingredients

  • 1 mug of soda crystals (generally £1) in most supermarkets
  • 2 mugs, just boiled hot water
  • 1 mug of bicarbonate of soda
  • 100ml castile soap, scented (Your favourite Dr Bronner’s.  It is the only one I have found that works.)

Method

Get a large plastic jug and put the soda crystals and hot water and whisk with a whisk.  Dissolving as much as possible.  Then add the bicarbonate of soda and whisk vigorously.  Once combined, add the castile soap and whisk again.  Done.

I then pour into an empty, plastic milk carton, 2L in size.  It will only come up about halfway up the bottle, but when left alone this mixture really thickens, so one needs to shake it vigorously again.  However, if too thick add a little warm water.  I add about 100ml per load.

Liquid Soap – My Struggle


Image

So, I have made two (yes, count them) failed batches.  I followed a recipe on soaping101.com and recently made contact with soapmakingforum.com confirmed what I kind of knew from these, shall we call them, experiments.  The glycerin element was too low.  Now, if you are not into soap-making, I thought I’d found an easy-peasy way to make liquid soap akin to a famous doctor’s brand (Dr. Bronner).  Dr Bronner’s soaps are lacking the normal shedload of chemical rubbish that most high street brands contain.  BUT, and as you can see it’s a big one, it is expensive.   So I set about making my own.  These failures have set  me back, as I hate waste but as you can see from my latest version is completely unusable.

My motivation is to make my own liquid soap for all household and personal hygiene purposes with as little unnecessary chemicals added to it, as possible.  I will not need to use preservatives as I will be just mainly be producing for myself.  But I’m also hoping to make it a little cottage industry, if I can get the hang of it, who knows?

I will carry on and when, I’m not going to say if, I do,

I will post my success story and recipe.  Wish me luck.

Linseed/Flaxseed wraps

P1050269

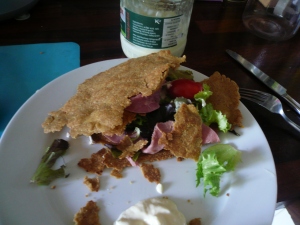
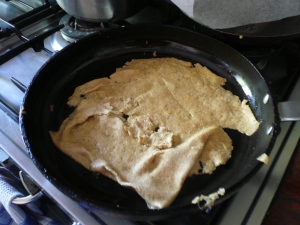
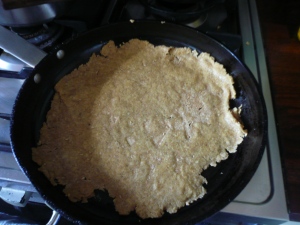
Today I have been mainly making linseed/flaxseed (‘you say tomarto, I say tomAto’) wraps.  The first picture above shows the wrap a little on the crispy side but it did for lunch and my first attempt.

P1050270 Yay!

P1050272 Boo!  Ripped it as I put it into the pan.

P1050268 Another go.

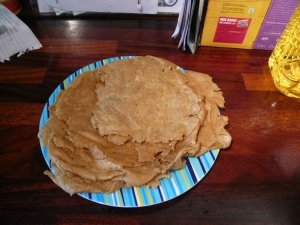
P1050273 Pile o’wraps.

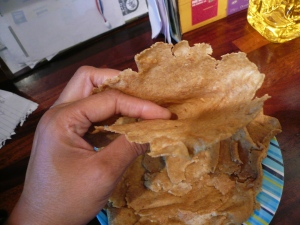
P1050274  Is bendy, si?

So, I’ll give you the recipe which I borrowed from this lovely lady from http://www.colorfulcanary.com and her very informative video http://www.youtube.com/watch?v=n5UtbGQ9c6Y.  And then, I’ll give you my learnings and some may say, (not me, of course, I’m far too modest for that, improvements).

Ingredients

  • 1.5 cups of golden flaxseed/linseed, ground (I ground them like my teacher, in a coffee mill which is an attachment to my liquidiser).  As this is an American recipe, I didn’t measure but used approximately 1.5 normal ceramic mugfuls.
  • 1 tbsp oil into mixture and 1 tbsp oil for frying
  • 0.5 tsp cumin seeds (optional)
  • Water

Method

Grind the flaxseeds and put in a bowl.  Then, if you want to flavour with cumin seeds (I didn’t this time for this test as I was trying to get outta the house), fry the whole cumin seeds in cooking oil (I use olive) when fragrant.  Then pour all the hot oil and cumin seeds in the ground flax and stir for a few seconds.  Then add water bit by bit, stirring all the time, until you have a sticky (not waterlogged) messy ball.  Leave for 1 hour……

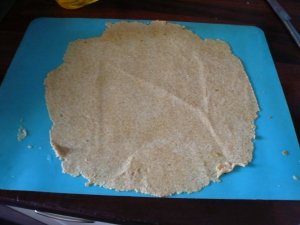
Get out some baking parchment/silicone mats  (or both as I did) and a rolling pin.  Divide your dough into 4 balls.  I placed a silicone mat on the rolling surface and put a sheet of baking paper on top and starting rolling on top of it until it was thin, lifting the paper periodically to remove the creases. Once finished, I cut off some odds and ends as I wanted it to fit into a frying pan.  Put a dollop of oil in the pan and let it heat up a bit.  Loosen the rough disc shape with a fish slice and, fold the outer edges in and lift it into the pan.  Once in the pan flip out the edges so that it is completely flat.  Frying both sides for about 30-45 seconds on each side.

Voila!

Learnings.  I didn’t add enough water initially, so I re-rolled the remaining balls of dough and added more water and left for about an hour again.  I didn’t use cornflour to dust but maybe I would a little bit next time, as even with the silicone mat, it did catch a little in the middle.

These can be used for wraps for lunches or I’m going use one like a chapati when I have an Indian next.  Yippee.

Rich avocado chocolate dessert

Image

If your first reaction on reading, ‘avocado’ and ‘chocolate’ in the same meal has you turning in to Peter Kay and his “Garlic?!… Bread!?…Garlic bread??! routine, please bear with me as it really does work.  The rich texture of the avocado (they do need to be ripe) and their very mild taste, combined with cocoa is something of a revelation.  You have a lovely, soft gooey pudding thing going on.

I cobbled together this recipe from various sites and books.  However, it is pretty simple as:

Ingredients

  • 2 avocados, the riper the better, stones removed.
  • 2-3 tbsps 100% cocoa powder
  • 3 tbsps coconut oil
  • 2 tsp vanilla extract

Using a food processor whizz all ingredients together.  As someone who’s trying to control my sweet tooth, it is at this point that you add your sweetener of choice in the amount you require, as it all depends how much sweetness you need, so I’m not going to give an exact direction but would advise against sugar and artificial sweeteners from a health perspective.

  • Natural sweetener (to your taste)  I used approximately 1 tbsp coconut nectar (knocking around the larder) and 1 tsp maple syrup.  It tastes as sweet as 85% chocolate to me.  You could of course, use honey if you wish.

I’m also freezing about the same quantity again, so will report back on taste, texture and picture in due course as I’d love to have an easy chocolate ice cream at my disposal.

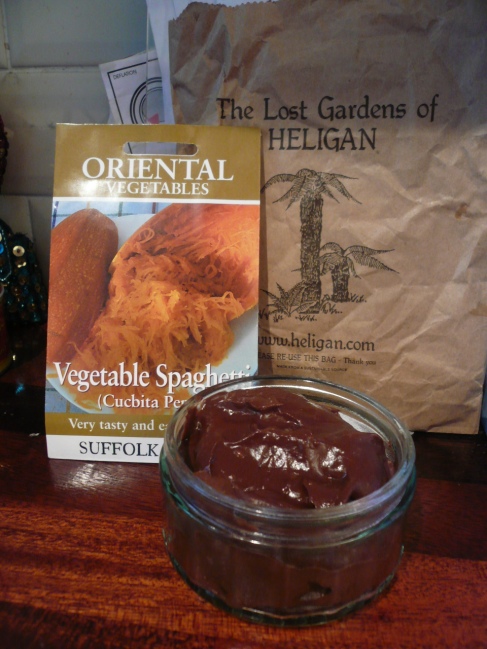
To explain the picture, I’ve just come back from Cornwall and visited ‘The Lost Gardens of Heligan’ and bought some seeds.  Here’s hoping next year is a bumper harvest in my tiny garden.

Meal planning

In a bid to save money and control food wastage and eat well, I regularly create meal plans.  As I follow The Harcombe Diet, I eat real food (i.e. very little processing except by me), avoid added sugar and don’t mix high carbs with high fat.  I’m going to post my meal plans which incorporate my wishes, with that of my husband who’s now doing 5:2 fast diet and my children who aren’t on any kind of weightloss diet per se, but I just want the them to eat unprocessed food.

I’d rather have posted the whole thing neatly, but in order to see the whole sheet, you scroll to the right at the bottom of the table.  I don’t yet know how to do that to make it a more useful document.  There’s probably a few tweaks to it that I do during the week as things change or I realise that activities for the week necessitate a change in the menu.

Speedy ‘never buy mayo again!’ Mayonnaise

This recipe accompanies the video of the same name.  This recipe is the latest version in order to create thicker, Hellman’s-like mayonnaise, so is slightly different from the proportions discussed in the video.

Ingredients

2 whole eggs
1 tsp cider vinegar/lemon juice
1 tsp Dijon mustard
1/4 tsp salt
a good pinch of white pepper (I use black as I don’t mind specks of black in the mayo)
12 fl oz/355 ml mild olive or sunflower oil (not virgin o o because flavour will be too strong)

For the speedy mayonnaise, place all the ingredients in a narrow bowl or jug and mix on a high speed with a stick blender (this is key – it won’t work in a food processor because it needs the speed of the blender to make it emulsify). It will thicken at once to create a creamy mayonnaise.

If you want a looser mayonnaise, add a tbsp more cider vinegar/lemon and the resulting mayonnaise will be more like the softer French style mayo.

Simple clothes conditioner

This post won’t take long.

Ingredients

Distilled white vinegar

Method

Pour approximately 60ml of the vinegar into the softener section of your washing machine drawer per wash.  And that’s it!

Distilled vinegar has a long history of being great for softening and conditioning clothes.  You cannot smell the vinegar smell at all after the clothes have dried especially good for those who react to high, octane commercial conditioner smells.  I’ve recommended this for my friend as her daughter suffers from croup which seems to be exacerbated by her overly perfumed clothes.  It also has a deodorising effect.