Linseed/Flaxseed wraps

P1050269

Today I have been mainly making linseed/flaxseed (‘you say tomarto, I say tomAto’) wraps.  The first picture above shows the wrap a little on the crispy side but it did for lunch and my first attempt.

P1050270 Yay!

P1050272 Boo!  Ripped it as I put it into the pan.

P1050268 Another go.

P1050273 Pile o’wraps.

P1050274  Is bendy, si?

So, I’ll give you the recipe which I borrowed from this lovely lady from http://www.colorfulcanary.com and her very informative video http://www.youtube.com/watch?v=n5UtbGQ9c6Y.  And then, I’ll give you my learnings and some may say, (not me, of course, I’m far too modest for that, improvements).

Ingredients

  • 1.5 cups of golden flaxseed/linseed, ground (I ground them like my teacher, in a coffee mill which is an attachment to my liquidiser).  As this is an American recipe, I didn’t measure but used approximately 1.5 normal ceramic mugfuls.
  • 1 tbsp oil into mixture and 1 tbsp oil for frying
  • 0.5 tsp cumin seeds (optional)
  • Water

Method

Grind the flaxseeds and put in a bowl.  Then, if you want to flavour with cumin seeds (I didn’t this time for this test as I was trying to get outta the house), fry the whole cumin seeds in cooking oil (I use olive) when fragrant.  Then pour all the hot oil and cumin seeds in the ground flax and stir for a few seconds.  Then add water bit by bit, stirring all the time, until you have a sticky (not waterlogged) messy ball.  Leave for 1 hour……

Get out some baking parchment/silicone mats  (or both as I did) and a rolling pin.  Divide your dough into 4 balls.  I placed a silicone mat on the rolling surface and put a sheet of baking paper on top and starting rolling on top of it until it was thin, lifting the paper periodically to remove the creases. Once finished, I cut off some odds and ends as I wanted it to fit into a frying pan.  Put a dollop of oil in the pan and let it heat up a bit.  Loosen the rough disc shape with a fish slice and, fold the outer edges in and lift it into the pan.  Once in the pan flip out the edges so that it is completely flat.  Frying both sides for about 30-45 seconds on each side.

Voila!

Learnings.  I didn’t add enough water initially, so I re-rolled the remaining balls of dough and added more water and left for about an hour again.  I didn’t use cornflour to dust but maybe I would a little bit next time, as even with the silicone mat, it did catch a little in the middle.

These can be used for wraps for lunches or I’m going use one like a chapati when I have an Indian next.  Yippee.

Rich avocado chocolate dessert

Image

If your first reaction on reading, ‘avocado’ and ‘chocolate’ in the same meal has you turning in to Peter Kay and his “Garlic?!… Bread!?…Garlic bread??! routine, please bear with me as it really does work.  The rich texture of the avocado (they do need to be ripe) and their very mild taste, combined with cocoa is something of a revelation.  You have a lovely, soft gooey pudding thing going on.

I cobbled together this recipe from various sites and books.  However, it is pretty simple as:

Ingredients

  • 2 avocados, the riper the better, stones removed.
  • 2-3 tbsps 100% cocoa powder
  • 3 tbsps coconut oil
  • 2 tsp vanilla extract

Using a food processor whizz all ingredients together.  As someone who’s trying to control my sweet tooth, it is at this point that you add your sweetener of choice in the amount you require, as it all depends how much sweetness you need, so I’m not going to give an exact direction but would advise against sugar and artificial sweeteners from a health perspective.

  • Natural sweetener (to your taste)  I used approximately 1 tbsp coconut nectar (knocking around the larder) and 1 tsp maple syrup.  It tastes as sweet as 85% chocolate to me.  You could of course, use honey if you wish.

I’m also freezing about the same quantity again, so will report back on taste, texture and picture in due course as I’d love to have an easy chocolate ice cream at my disposal.

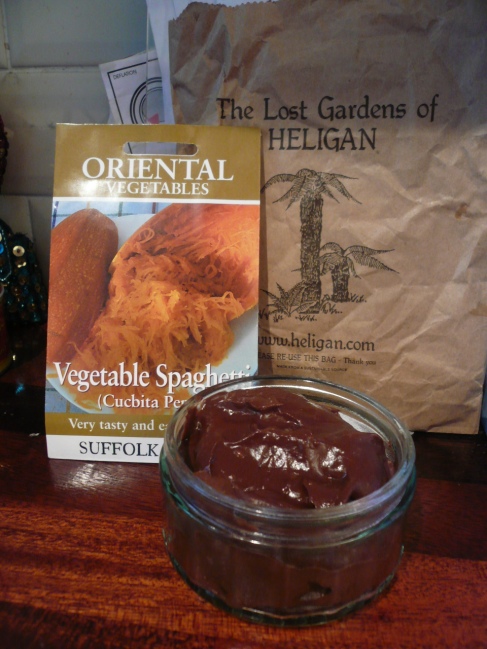
To explain the picture, I’ve just come back from Cornwall and visited ‘The Lost Gardens of Heligan’ and bought some seeds.  Here’s hoping next year is a bumper harvest in my tiny garden.

Meal planning

In a bid to save money and control food wastage and eat well, I regularly create meal plans.  As I follow The Harcombe Diet, I eat real food (i.e. very little processing except by me), avoid added sugar and don’t mix high carbs with high fat.  I’m going to post my meal plans which incorporate my wishes, with that of my husband who’s now doing 5:2 fast diet and my children who aren’t on any kind of weightloss diet per se, but I just want the them to eat unprocessed food.

I’d rather have posted the whole thing neatly, but in order to see the whole sheet, you scroll to the right at the bottom of the table.  I don’t yet know how to do that to make it a more useful document.  There’s probably a few tweaks to it that I do during the week as things change or I realise that activities for the week necessitate a change in the menu.